Lithium-ion batteries are everywhere and they are awesome also for hobbyist projects. I’ve been tempted more than once to use old smartphone batteries in my projects, but recharging them might be a problem.
Well, this time I tried my hand at recharging small coin-cells like the LiR2032. I’ve been looking around for commercial chargers, but they seem to be kind of unpopular. Turns out you can do one yourself with less than 2€.
The TP4056 (datasheet here) is a little IC which serves the purpose perfectly and currently it can be found on dx.com along with an additional protection circuit for 1.57€. However, this version comes pre-packaged to work with bigger batteries (>1000 mAh) and shouldn’t be used with coin-cells. Lets see why.
The difference lies basically in the charger’s maximum charging current. The previously linked TP4056 uses 1A maximum current, but LiR2032 datasheet recommends a maximum of 35mA. This current is regulated by a resistor placed between pin2 and ground on the charger (which on this board is called R1 and has a value of 1.2kohms). So, looking at the datasheet and doing the maths it turns out a resistance of about 35kohm is needed.

Okay. let’s go. I used
- the TP4056 board,
- a coin cell battery holder,
- a 47Kohm resistor
- a 10cm ribbon
- some pin headers, wire, PCB and soldering
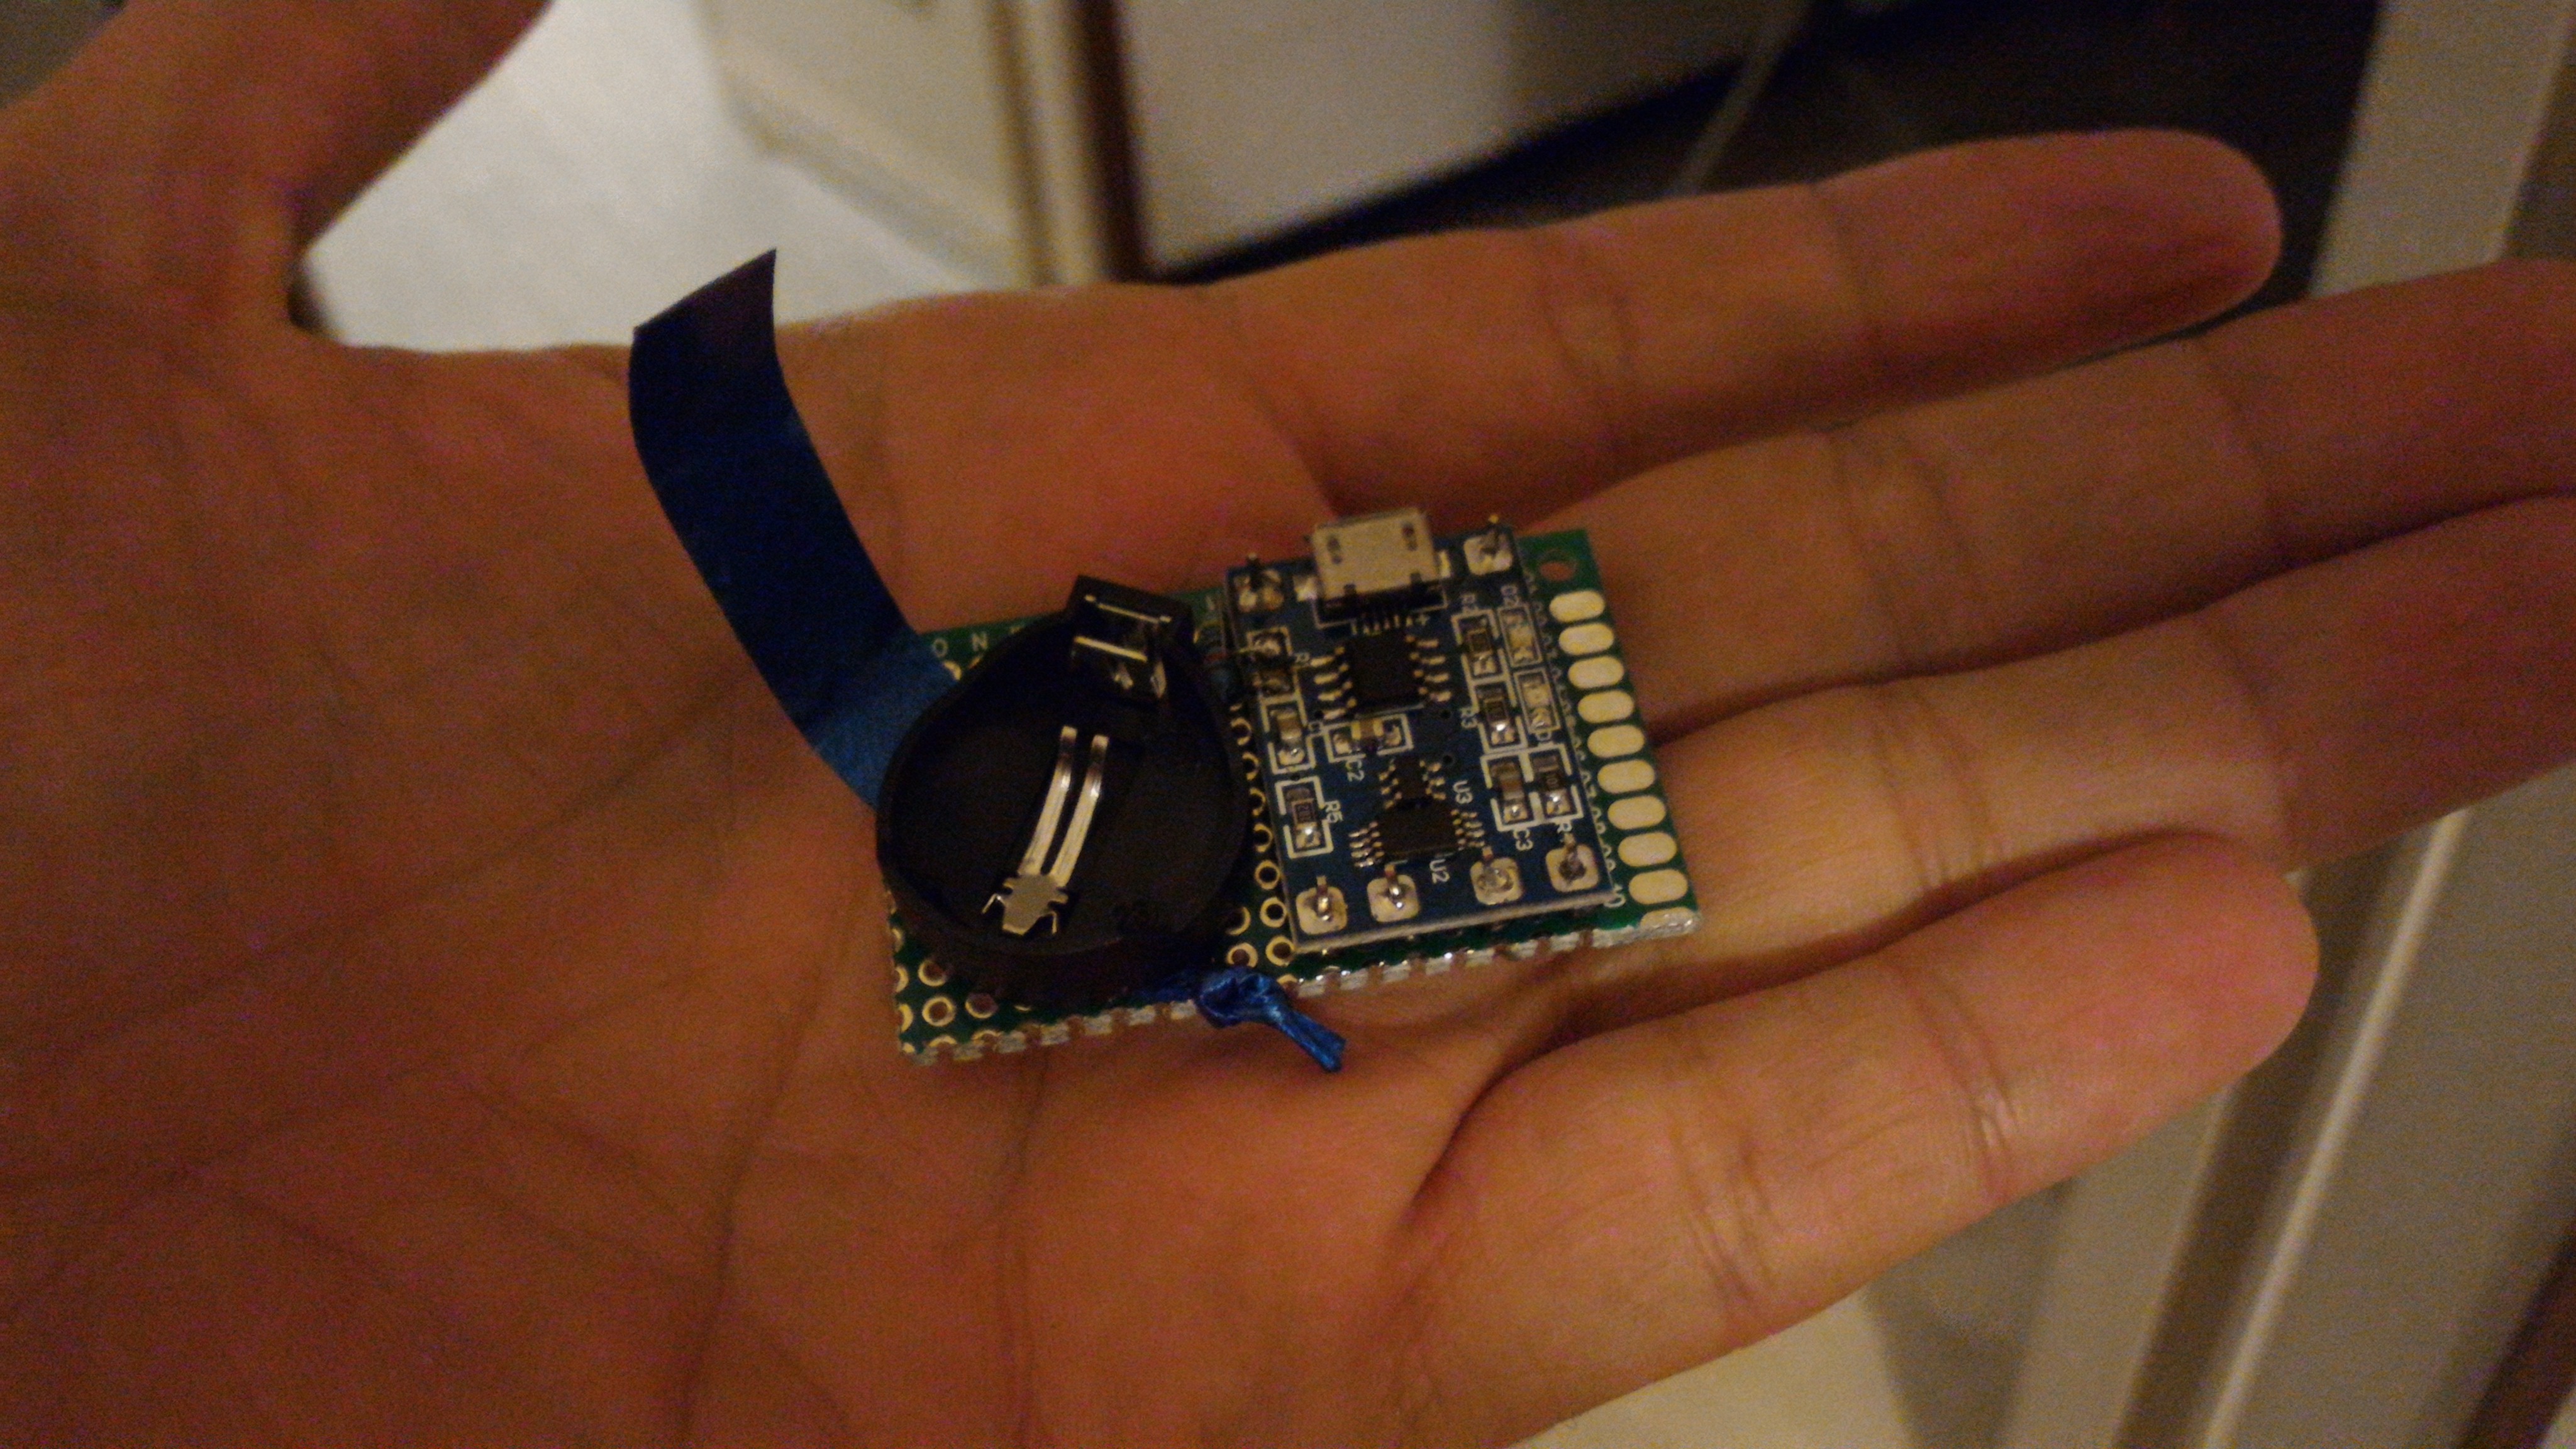
The assembling is quite straightforward, I just cut the PCB to size, mounted the TP4056 board on male pin headers, and mounted the coin cell holder over the ribbon, which I added for easier removal of the battery.
I didn’t have a 35Kohm SMD resistor available, so I replaced the old one with a “regular” 47Kohm resistor. Charging will be slower, but basically the slower the better. Soldering was doable although not trivial, a good set of pliers and tweezers definitely did help.

I soldered the wiring on the back… double check for correct polarity.

And voila. Charging an almost completely drained out battery took about 3 hours, during which all the assembly stayed at room temperature (based on a very accurate measurement with my fingers). Green light means charging done.

I still have to figure out exactly how to use this thing with bigger batteries, the main issue being find a way to keep the battery still. This is probably not going to be trivial since Li-ion batteries tend to come in every shape and size. Maybe I could use cable ties or rubber bands… I’m taking suggestions!
You must be logged in to post a comment.